This is a researched guide, based on published product information and practical planning. It is not a hands-on product test. Check the exact model and its current instructions before buying.
Take inventory at the shelf level
Work on one shelf at a time so you can finish a useful section without covering every counter. Group identical products together, then separate opened packages from unopened replacements. Keep a short list of duplicates and items you regularly forget you own.
Notice the actual problem before choosing a container. Are packets falling behind boxes? Are you opening a second bag because the first is hidden? Are tall packages blocking your view? Each problem points to a different change, and some need only a new position.
Choose categories around meals
Use broad categories that match how you cook: breakfast, quick lunches, baking, or dinner ingredients. A category should tell you where to look even when the brand or package size changes. Avoid creating a tiny labeled bin for an item you buy only occasionally.
For a narrow cupboard, try one breakfast section, one dinner section, and a shared reserve section. If a product serves several meals, choose its main home rather than splitting identical packages between unrelated bins. Everyone using the pantry should be able to explain the arrangement in a sentence.
Keep useful packaging information
Original packaging keeps the product identity and its printed directions together. Position packages so the information you use most is easy to reach. Reclose opened packages as directed; an open organizing bin does not replace the food’s own closure or storage requirements.
If you remove an outer carton to save room, first check what information would disappear. Keep ingredient, allergen, preparation, date, and product-identification details available. For individually wrapped snacks, leaving the carton intact may be simpler than creating a separate labeling system.
Use front and back rows deliberately
Put the package already in use where you naturally reach first, with matching unopened replacements behind it when the shelf permits. Keep shorter packages visible instead of burying them between tall cereal boxes. Face narrow boxes with their readable edge toward you.
A deep shelf needs a clear way to inspect the rear. One shallow bin that pulls forward can group small packets, while taller self-supporting boxes can remain directly on the shelf. Avoid making every category two rows deep if you cannot see what is behind the front row.
Buy for one specific job
For packets that collapse into a pile, compare low open bins or dividers. For a group you carry to the counter together, consider a handled container. For boxes that already stand neatly, another container may add walls without improving access.
As a size reference, OXO lists its Storage Bin at 14.25 by 8.95 by 4.55 inches and identifies pantry use. Compare that outside footprint with your shelf, then check the usable interior against your actual packages. A product labeled pantry storage can still be too deep for a shallow cupboard.
Set a restocking limit you can see
Give replacements a defined area. The limit can be as simple as one unopened cereal box behind the current box, or one reserve bin for frequently used ingredients. Choose quantities around your household’s use and shopping pattern rather than around unused shelf height.
Before writing the shopping list, check the reserve area. When it is full, find out why before buying another organizer: the category may need more space, or there may already be enough stock. Leave some flexible room for a temporary ingredient or a different package size.
Test one shelf through a grocery trip
Use the arrangement through cooking, shopping, and restocking before repeating it across the pantry. Pay attention to where bags end up when you are in a hurry. If groceries routinely sit on top of a bin, the category may be too narrow or the container may be awkward to load.
Keep the changes that reduce searching and putting-away steps. Add a second organizer only when you can name the problem it solves. Follow the chosen organizer’s care directions, and make sure it can be removed without unloading the entire cupboard.
Compare a researched example
Use the guide to check your space, then compare the exact product's measurements and limitations.
Our linked product picks include paid Amazon links. We may earn a commission if you buy through those links.
A quick visual checklist
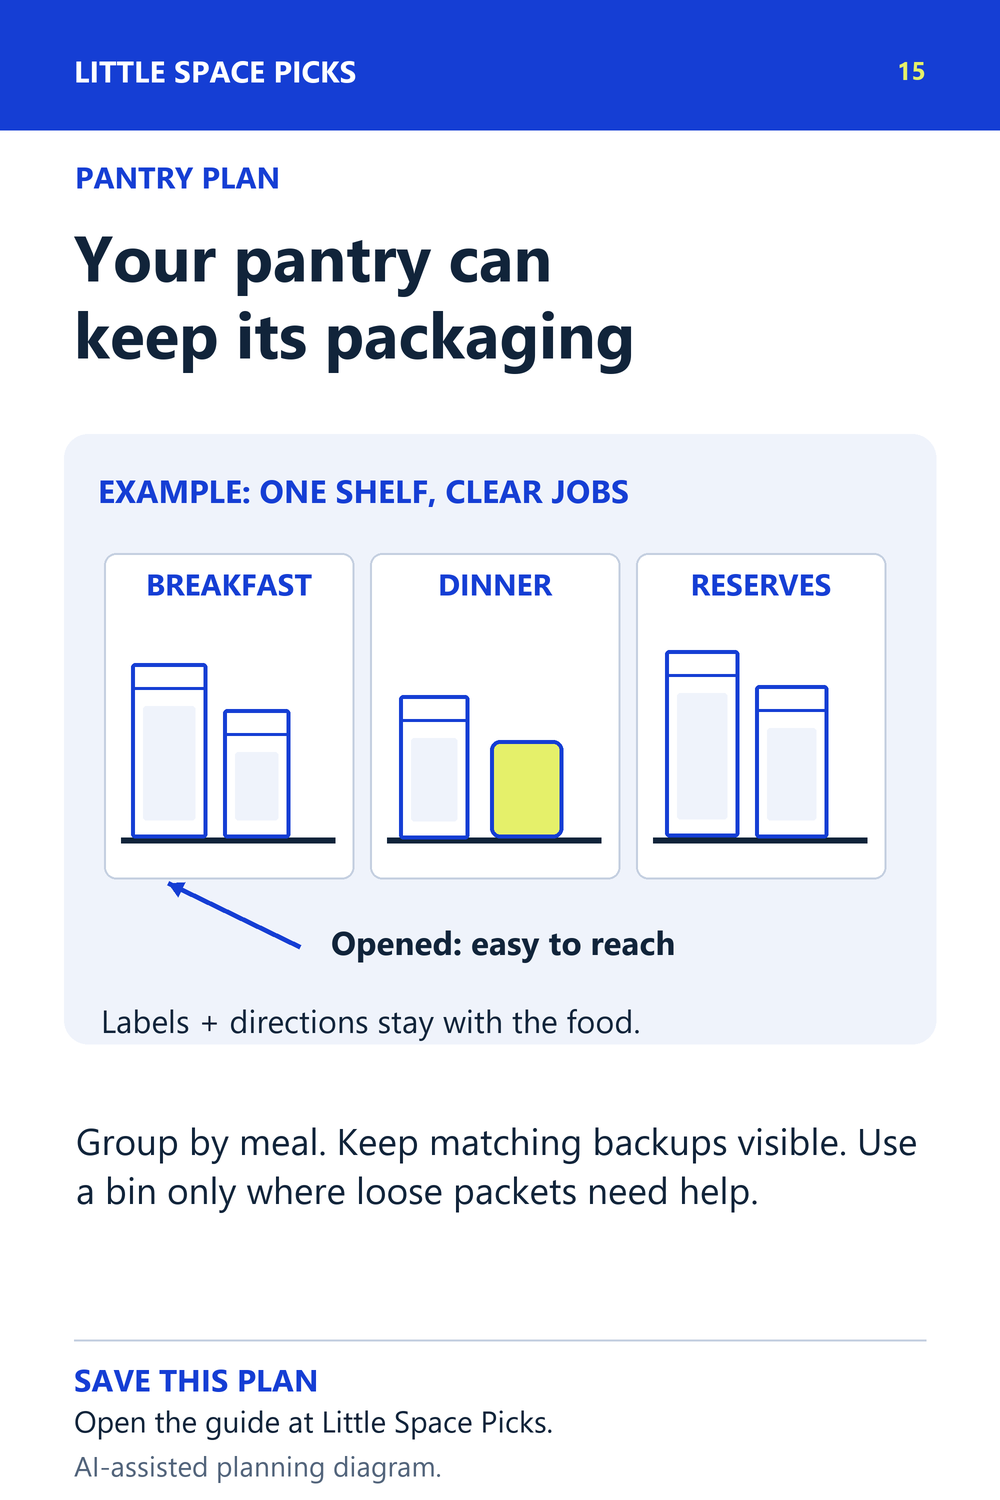
An original Little Space Picks planning diagram. Download the checklist.
Sources & further details
Sources checked October 4, 2026. Model details and installation guidance can change.